How to Add a Promotion on LinkedIn: Tutorial (With Pictures)
Congrats on the new promotion! Here are some next steps on how to update your Linkedin and share this promotion with your network.


Photo by Patti Black / Unsplash
There are 2 ways to update Linkedin with a new promotion:
- Editing your existing experience to include the promotion
- Adding your promotion as a new position
We’ll explain how to use Linkedin’s built-in features to update or add your promotion on the professional networking website, as well as how to craft a great post to share and celebrate your new achievement!
Method #1: Edit your existing Experience
Here are the steps to the first method for adding a promotion on Linkedin.

Navigate to the Experience section on your page, and click the pencil icons to edit this section where needed: First, click the pencil icon to edit the section overview, and second click the pencil icon again to edit the specific job you wish to update with the promotion.

When you edit an experience, make sure to edit the title first. This won’t actually get rid of your original title, but this way you will prompt Linkedin to ask “Did you get promoted?” so you can instead “Add a new position to show your career progression”.
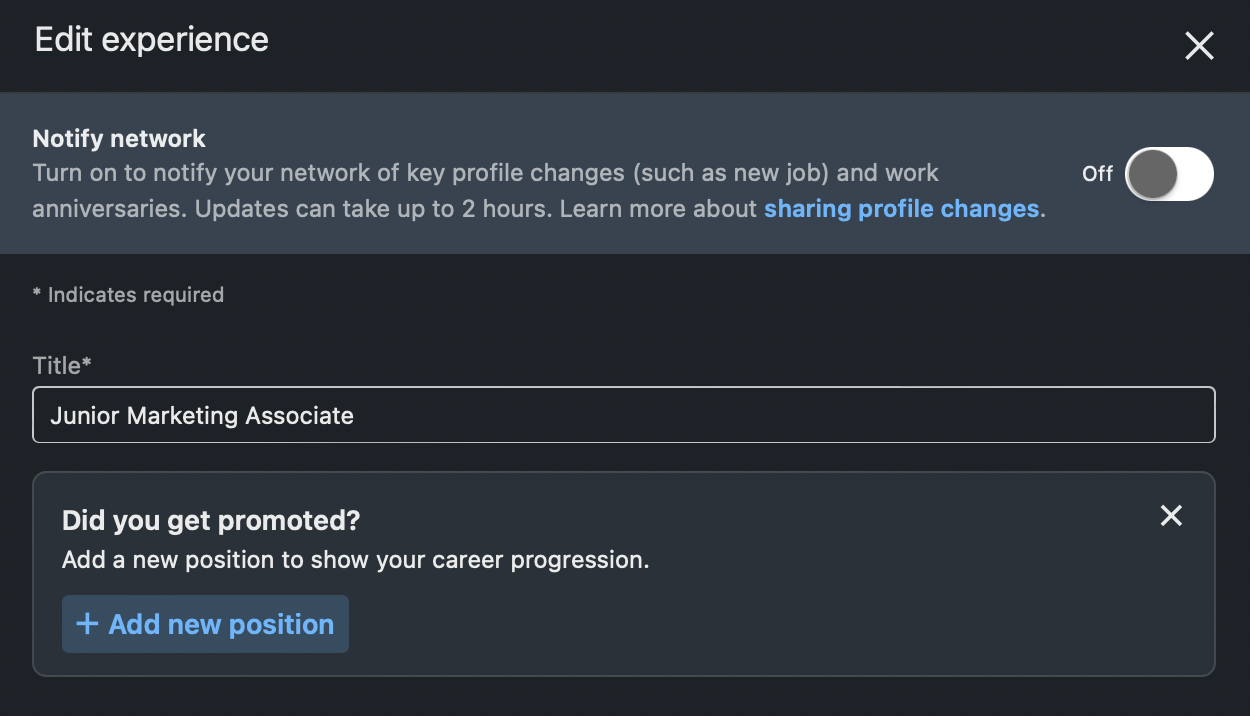
If you’ve edited the title, but you’re not seeing any prompt being raised by Linkedin, this may be because your new title is too similar to your existing title, in which case, either try a slightly different title for your new position, which isn’t ideal or simply keep reading ahead to the steps for the second method!
Method #2: Add your promotion as a new position
The second method for adding your promotion to Linkedin takes a little more time but is fairly straightforward as well. Simply add your promotion as a new position on your profile.

This time, instead of navigating to the pencil icons, navigate to right beside the pencil and you’ll find a plus sign under the experience section as well. Click this plus sign to bring up the options: “Add a career break” and “Add position.” “Add position” is the option that you’ll be clicking to add your promotion.
With this method, adding a promotion is very similar to how you added your experience the first time.
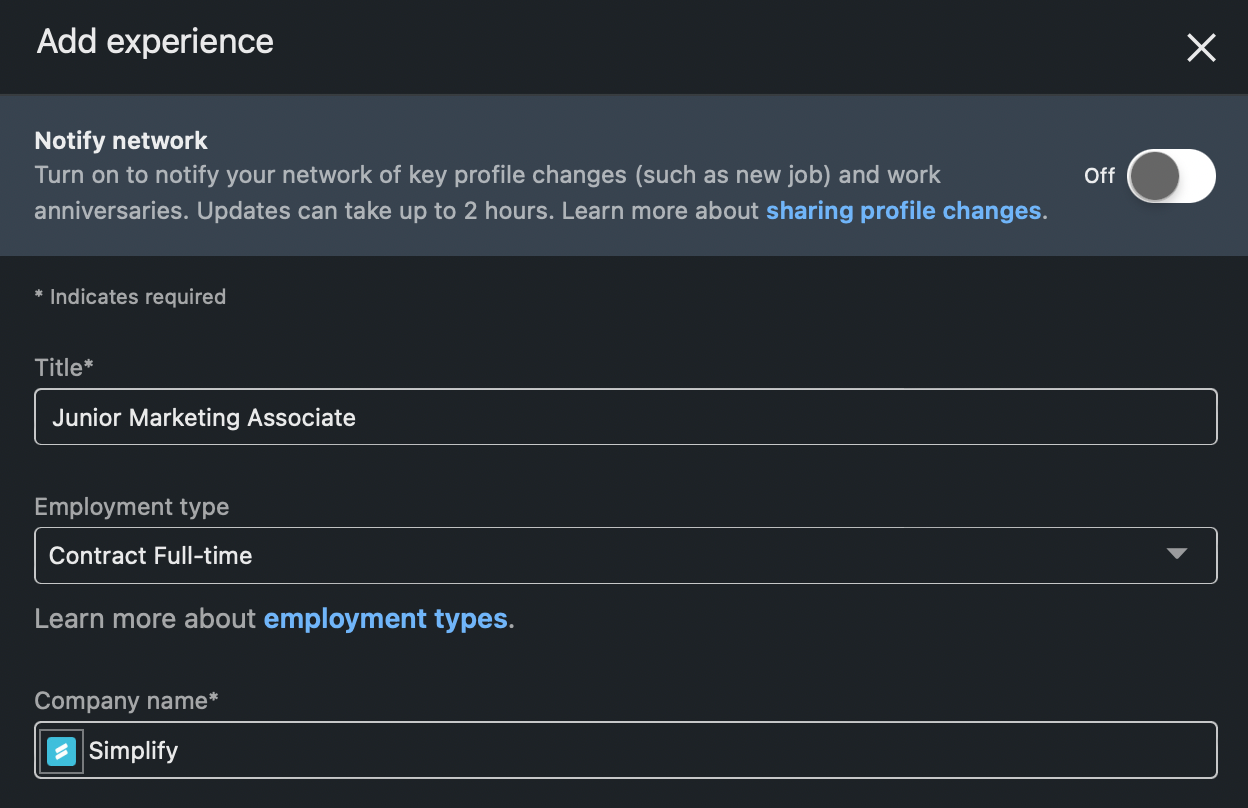
Using Method #1, you won’t have to manually enter the employer information as you’re editing an existing position you already entered the information for once. With Method #2, there’s new information you will have to manually type into the website.
Include all the details of your new position that you feel comfortable entering, such as job type, location, and start date so you can publicly show when your old position ended, but make sure to include the exact same employer name as the position you already have listed and are simply trying to update.
Writing the employer name incorrectly will result in a brand new-looking position on the website as opposed to a promotion.
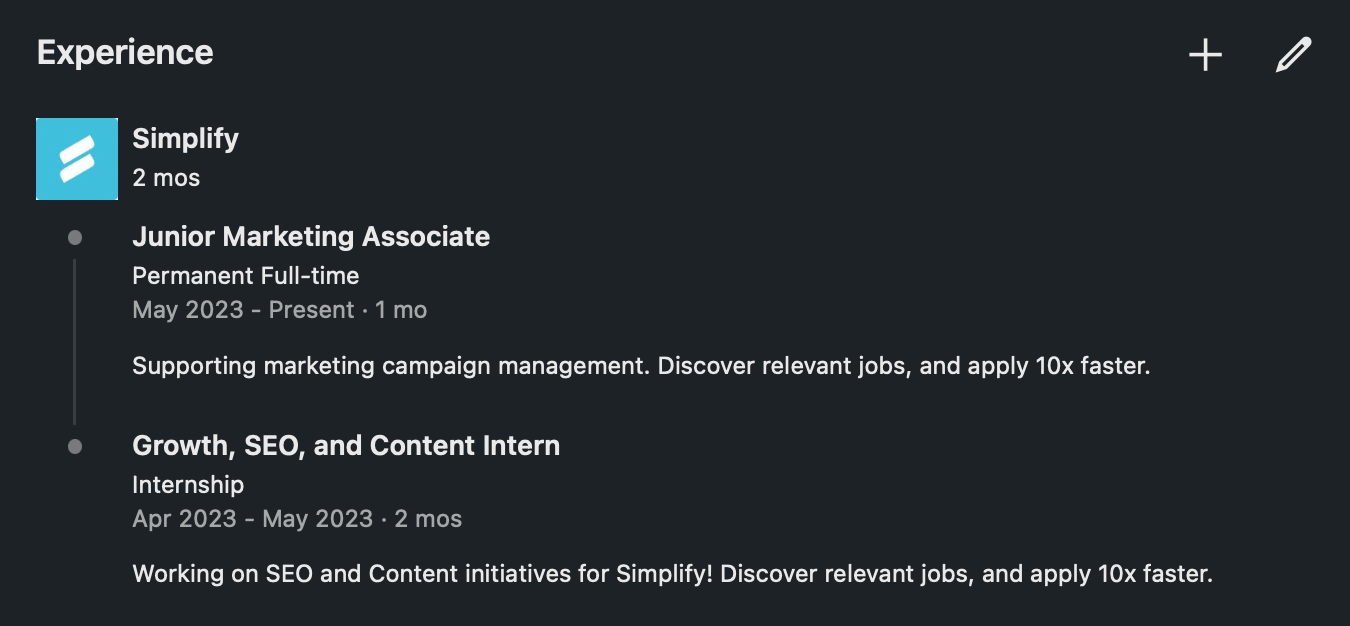
The parts of your Linkedin that you might want to also update include your profile headline as this might currently read as your old position. You can update this manually on your profile page to include your new promotion.
Congrats! Both of these methods will help you add your new promotion on Linkedin.
The next step is to share the news with your network, and although Linkedin already prompts you to share with your network, we’ll teach you how to craft a great message to go along with the news.
‼️ Don’t forget to proofread anything written under your new promotion or any other section you’ve chosen to simultaneously update, as well as the new promotion post you’re going to share!
How to share your promotion with your network
After you add your experience, you’ll be prompted by Linkedin to “Notify network” and this allows you to create a post to share your new position with those who you want to see the news in their feed.
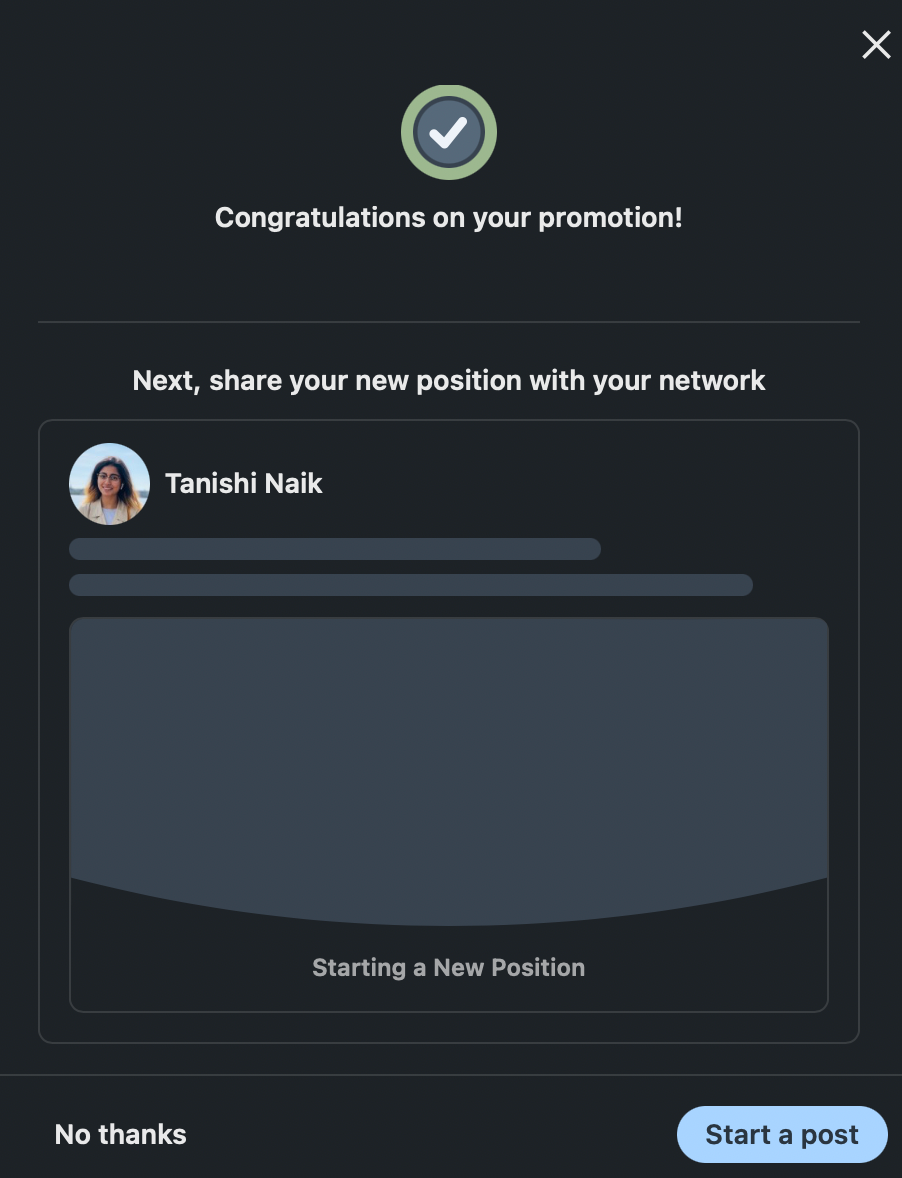
Note that when you share your promotion, your connections will be updated via a notification that you’ve earned a new promotion unless your network connections have specifically changed their settings or unless you toggle the settings for your updates under Settings ➡️ Visibility to change who sees this post.
You can opt to not share any kind of update to your network, but likely everyone wants to celebrate with you and has only positive things to say and many congratulatory messages to give! So consider updating your connections with the good news and read onwards to learn how to draft an ideal message to share your promotion on Linkedin.
What kinds of things should you include in your post?
You can shape your post however you’d like, and make it as personal or short as you see fit, depending on the kind of experience you had during your last job. Consider including:
- Give thanks to those who supported you in your time during your last position. Tip: You can tag people on Linkedin if they also have a profile on the website!
- Briefly shout out experiences or projects you really enjoyed. Tip: You can add images from your journey as a visual representation of the things you’re writing!
- Achievements or awards you met
- Overview of what your position was like and the duration for which it lasted
- Provide any tips for those at your level of career (or anyone who might be interested)
- Describe how your new job looks and what you’re excited for
- Give thanks to those who helped you get to your new position!
- Overview of how this position reflects your professional goals or values
- Practical information to share if the role is looking to be filled by a new employee
Here's an example of a sample post using one of the templates below:
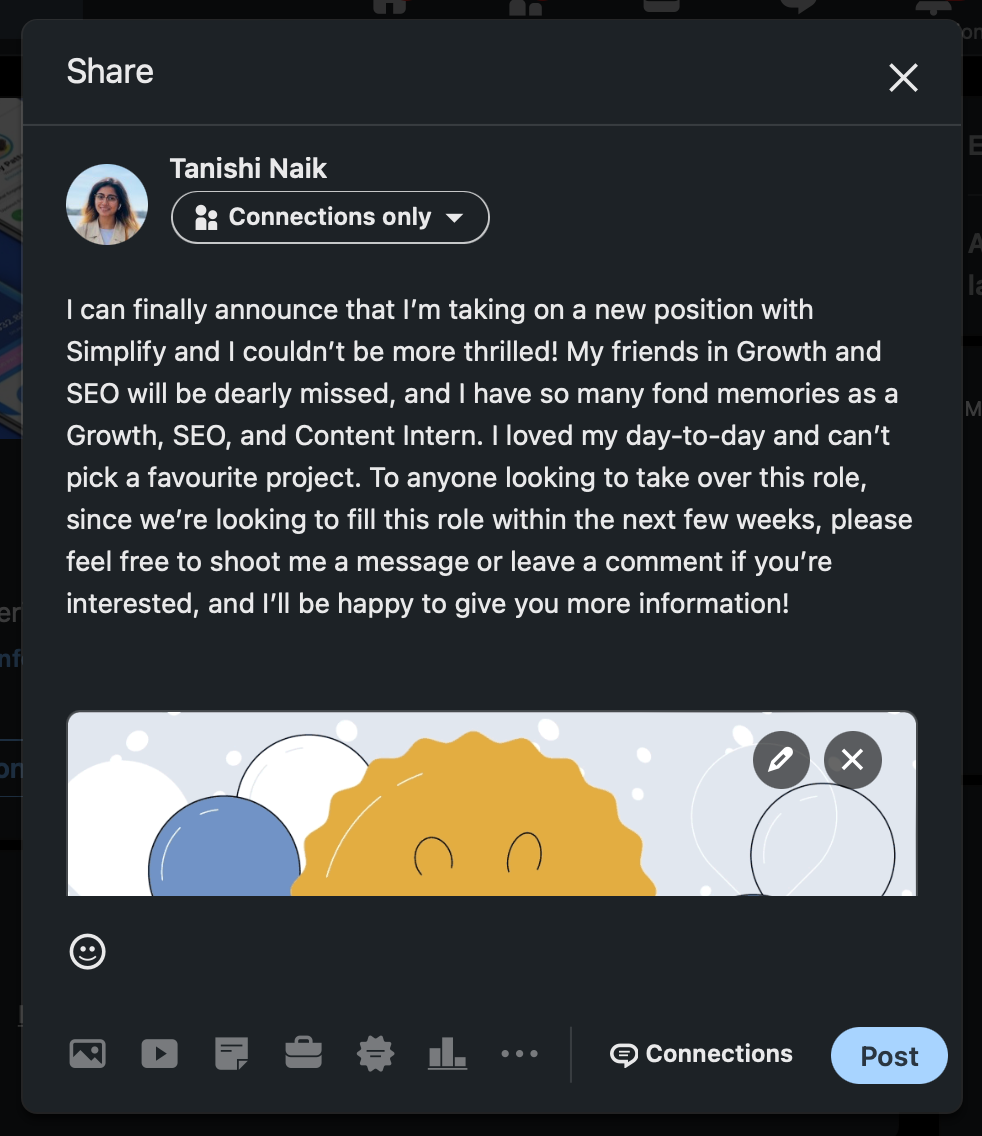
Still not sure how you should go about writing your posts? Here are some templates of posts that you can use to write yours!
Example #1
I’m happy to announce that I’ll be accepting a new position at [X company name here] as a [insert new role]. I loved working in my last position for [X number of years] and can’t wait to see the things I’ll achieve in my new role. I have nothing but gratitude in my heart for those who helped me get here, including everyone who supported me in my last position as [insert previous position here] ([@tag name]) and everyone who I will encounter during my new role. I’m looking forward to building my leadership skills and seeing what else I can accomplish!
Example #2
I can finally announce that I’m taking on a new position with [X company name] and I couldn’t be more thrilled! My friends in [X department] will be dearly missed, and I have so many fond memories as [X old position here]. I loved my day-to-day and can’t pick a favourite project. To anyone looking to take over this role, since we’re looking to fill this role within the next few weeks, please feel free to shoot me a message or leave a comment if you’re interested, and I’ll be happy to give you more information!
However you choose to update your Linkedin with exciting new information, congratulations, and here’s to more promotions in the future!

